IMPORT EXPORT
NCheck Bio Attendance Integration Manual total work hour report can be exported in order to import in other applications such as payroll related software. This guide explains importing total work hour report in following payroll systems.
Import total work hour report in Tally ERP system
Tally ERP uses Attendance Voucher to record employee’s attendance data, based on Attendance/Production types (i.e., present or absent days, overtime hours and so on).

Figure 32 Logo of Tally ERP system
An Attendance Voucher allows you to record the attendance/ production units for employees. Tally ERP gives you the flexibility to enter the attendance records through a single attendance voucher for a payroll period, or through multiple attendance vouchers as and when required within a payroll period. You also have the option of recording one attendance/ production voucher per employee per day or collectively for a month or any other variation thereof for all the employees. NCheck Bio Attendance Integration Manual can export employee’s attendance records in daily, weekly or monthly using Total work hour report. A Total Work Hours Report data can be imported to tally as a single Attendance Voucher. If the attendance data is imported in daily basic, it will create multiple attendance vouchers for a given pay period. If Attendance data is imported weekly, monthly or user selected period, it will create a single attendance voucher for a given pay period. NCheck Bio Attendance Integration Manual can export Total Work Hours report into an Excel file. Tally provides a TDL extension for Importing Payroll Data which includes a User Manual. Total Work Hours exported to excel from NCheck Bio Attendance Integration Manual can be imported to Tally Payroll Vouchers using this Payroll Data Import TDL extension from Excel files. Please use following procedure to export attendance data to Tally ERP system.
Make sure that Tally System attendance/Production Payroll units are defined in hours
Total work hour report can be generated as follows
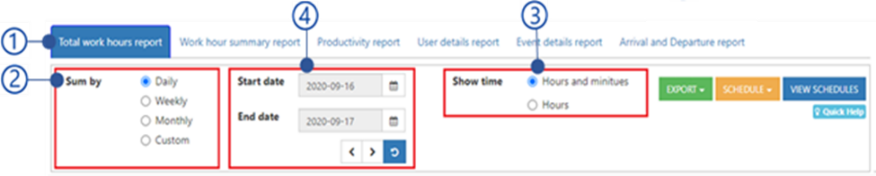
Figure 33 Export total work hour report
Select the total work hour report from reports
Select sum by daily, weekly, or monthly
Select the required date range and refresh the report
Select Show time in Hours to show time in decimals in exported csv file. Select refresh button
Select Reload button to reload the report
You can see the total work hour report as follows
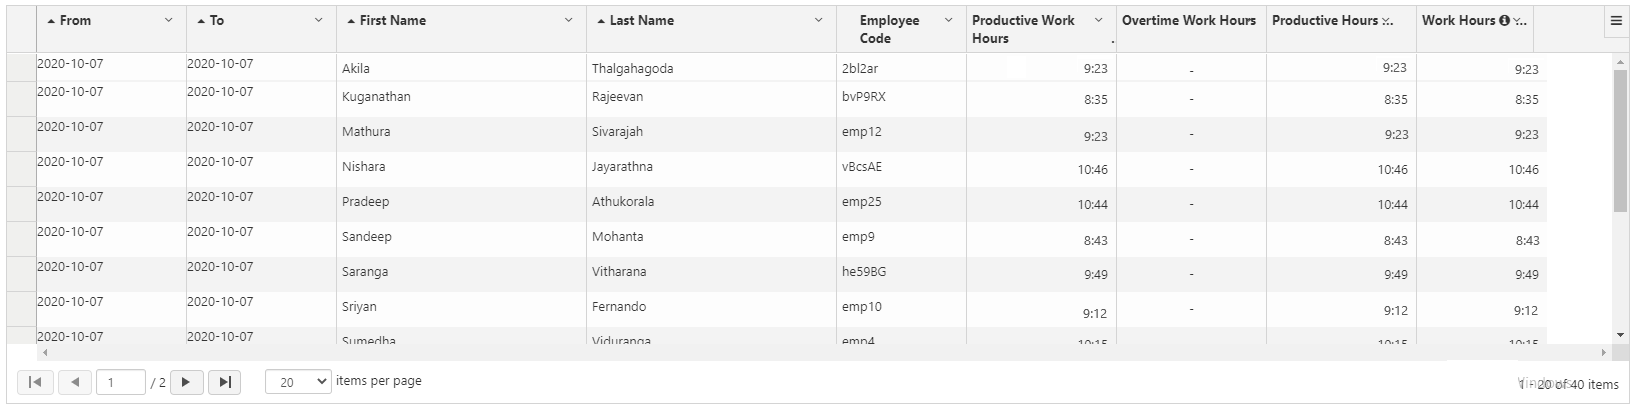
Figure 34 Total work hour report view
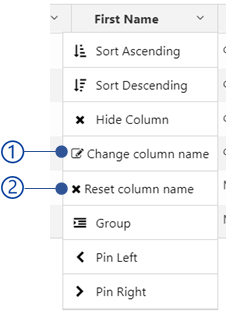
Hide all the columns from the total work hour report except First name and Work hour columns. To hide the columns, use the table option menu as follows
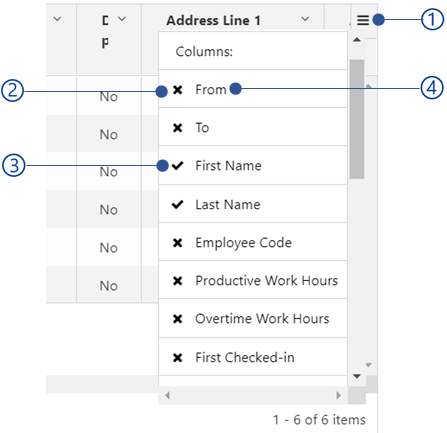
Figure 35 Figure . Table options menu
Table options menu button
Hided column
Visible column
Column name
Select the on the column name to hide/visible the column in report
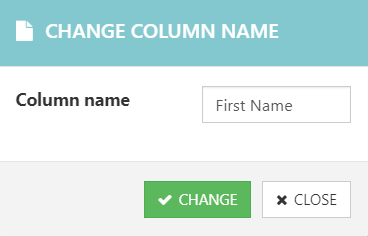
Rename column First Name as Employee Name and Work hours as Attendance Value. Use column options menu to rename the columns as follows (Optional)
Select Export button and choose the CSV report option to export report in CSV format.
Open the report. Make sure that all employees are exported in the csv file
Add new Attendance/Production Type column after Employee Name column. Assign Attendance/Production Type name defined in the Tally System.
Ex: Attendance
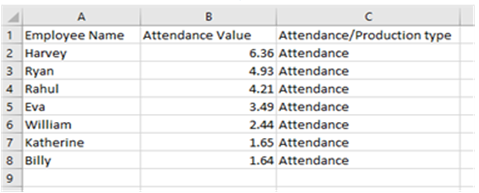
Figure 38 Add Attendance/Production Type column
Import Payroll data as mentioned in user manual – import payroll data
Import total work hour report in Quickbooks
QuickBooks desktop allows to import timesheet data as IIF (Intuit Interchange Format) files. IIF format is a text-based tab-delimited format very similar to .tsv file format. This guide describes how you can migrate NCheck Bio Attendance Integration Manual total work hour report (Daily) data in IIF format. To create such IIF file, user need to perform these main steps.

Figure 39 Logo of Quickbooks
Import work hour data (Daily) from NCheck Bio Attendance Integration Manual as a CSV file
Manipulate work hour report to format data and remove unnecessary data
Import work hour data (Daily) from NCheck Bio Attendance Integration Manual as a CSV file
Login to NCheck Bio Attendance Integration Manual and go to reports tab
Export Total work hour report as follows
Select the total work hour report from reports
Select Sum by as Daily
Show time should be in Hours and minutes
Select the required date range and refresh the report
Hide all the columns except First Name, Last Name, To and Work hours columns. To hide the columns, use the table option menu as follows
Figure 40 Figure . Table options menu
Table options menu button
Hided column
Visible column
Column name
Select the on the column name to hide/visible the column in report
Rename column name To as DATE and Workhour as DURATION. Use column option menu to rename column names as follows.
Select Export button and select CSV to import report in CSV format
Manipulate work hour report to format data and remove unnecessary data
Open the csv file using a spreadsheet software, such as Microsoft Excel. Refer following guide to manipulate work hour report in Microsoft Excel.
Concatenate First name and Last name columns and create new column EMP
Refer this reference for more details about combine columns.
Set DATE column date format to DD/MM/YY format
Refer this article for more details about format column date format.
Download sample IIF file
You can download the sample .IIF file here. You can re-name the file as you wish. Open it using a spreadsheet software like Microsoft Excel.
Update correct header information using Timer list IIF file
Timer List IIF file can be exported from QuickBooks using File>Utilities>Export>Timer Lists as follows
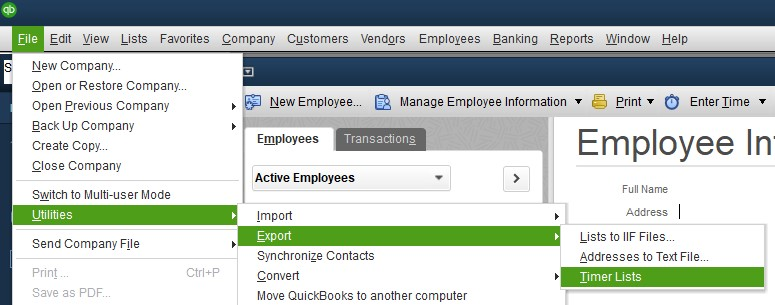
Figure 43 Export timer list
Exported Timer List IIF file header will have the Company details as follows.
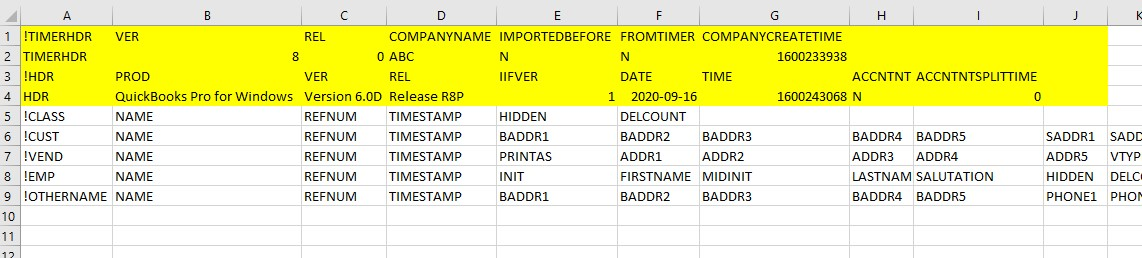
Figure 44 Company details of timer list header
Copy the first 4 lines highlighted in yellow color. Replace the 1st 4 rows of the sample file with this content. Now sample file will look like as follows.

Figure 45 Edited timer list
Merge manipulated report data
Follow these steps to merge work hour data we just modified to this IIF file.
First column value should be TIMEACT
For DATE column, merge the contents from the work hour report you just modified
JOB column
The name of the customer (or job). If you’re entering the name of a job, enter the customer’s name followed by a colon followed by the name of the job. Both the customer and the job names must also be on your Customers & Jobs list (CUST).
EMP column
merge the contents from the work hour report you just modified.
ITEM column
The name of the service item. The service item must also be on your Item list (INVITEM).
IPTEM column
Payroll Item for Paychecks.
DURATION column
Merge the contents from work hour report you just modified.
PROJ column
The QuickBooks class assigned to the activity (classes give you a way to group activities in meaningful ways in time reports). The Class must also be on your Class list (CLASS).
NOTE column
Description/Note for each time entry. You may enter up to 1000 characters.
BILLINGSTATUS column
Indicates the billing status. Enter one of these values mentioned below
0: not billable
1: Not billed
2: Billed
Import to QuickBooks
Now your worksheet IIF is ready to import in to QuickBooks. Follow below steps to import the worksheet to QuickBooks
Go to File>Utilities>Import>Timer Activities to import the worksheet IIF file. Once data is imported, a Timer Import Data report will be shown the data which was extracted.
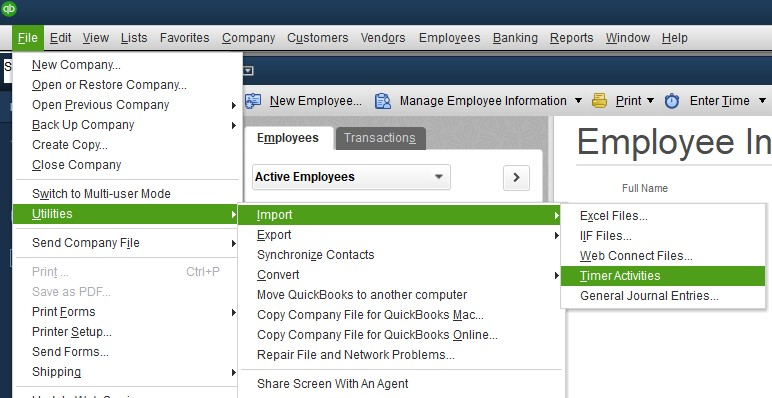
Figure 46 Import to Quickbooks
A confirmation dialogue will be shown as below. Click OK to select the IIF file we just created
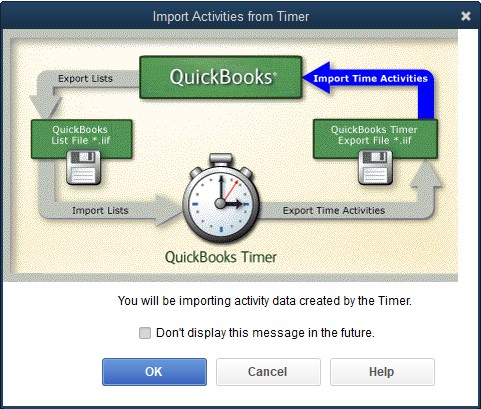
Figure 47 Import confirmation dialogue
Done! Now tour timer data will be imported to QuickBooks